How to install a Telgeoot EV Charging Station? With the growing popularity of electric vehicles (EVs), the demand for home charging solutions has surged. Installing a Telgeoot EV charging station at home offers the convenience of charging your electric vehicle at your own pace. In this guide, we will walk you through the step-by-step process of installing a Telgeoot EV charging station, ensuring a seamless and efficient charging experience.
Step 1: Select an Appropriate Location:
Choose a suitable location for your Telgeoot EV charging station. Consider proximity to your electric panel, parking space for your EV, and compliance with local building codes. Ensure the location provides enough space for cable management and allows for proper ventilation to dissipate heat generated during charging.
UL Listed - Ultra-Low Electricity Rates
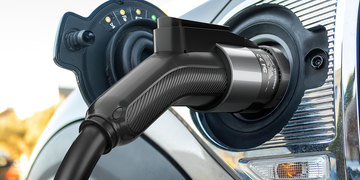
Charging stations are authorized to display the UL Mark, has been equipped with multiple safety protections, Over Voltage protection, Overload protection, Short Circuit protection, Ground protection, Earth Leakage protection. This charging unit can operate in environments of -30℃ to 55℃ (-22°F to 131°F). The connector operating life is up to 10000 times. Allows to adjust charging current range from 1 to 48A, level 2 EV 240V 11kw home charger can work 7X faster than a normal Level 1 chargers, Say goodbye to long charging times.
Step 2: Gather Required Tools and Equipment:
Before starting the installation, gather the necessary tools and equipment. Typical requirements include a screwdriver, pliers, a drill, mounting hardware provided with the Telgeoot charging station, and appropriate electrical tools for working with wiring.

Step 3: Turn Off Power:
For safety, turn off the power to the designated electrical circuit at your home's main electrical panel. Confirm that the power is off using a voltage tester to ensure a safe working environment.
Step 4: Mount the Telgeoot EV Charging Station:
Using the mounting template provided with the Telgeoot EV charging station, mark the locations for mounting screws. Securely mount the charging station to the chosen location, ensuring it is level and well-supported.
Step 5: Connect the Electrical Wiring:
Follow the manufacturer's instructions to connect the electrical wiring. Typically, this involves connecting the line, load, and ground wires to the corresponding terminals on the Telgeoot EV charging station. If you are not comfortable with electrical work, it is advisable to hire a qualified electrician for this step.
Step 6: Secure Cable Management:
Secure the charging cable along the designated cable path, ensuring it is protected from physical damage and does not pose a tripping hazard. Telgeoot charging stations often come with cable management accessories to keep the installation neat and organized.
Step 7: Power On and Test:
Once the wiring is securely connected, restore power to the electrical circuit. Power on the Telgeoot charging station and perform a test to ensure proper functionality. Confirm that the LED indicators on the charging station display the correct status.
Step 8: Register and Set Up:
If required, register your Telgeoot EV charging station with the manufacturer and set up any necessary accounts or configurations. Some charging stations may come with smart features that allow for remote monitoring and control via a mobile app.
How to install a Telgeoot EV Charging Station? Installing a Telgeoot EV charging station at home is a rewarding investment that ensures your electric vehicle is always ready for the road. By following these step-by-step instructions and adhering to safety guidelines, you can confidently set up your charging station and enjoy the convenience of charging your EV in the comfort of your own home.